


Home Theater: Budget Build
What I put into building my project,
and what it takes to build one…
By Anthony C.

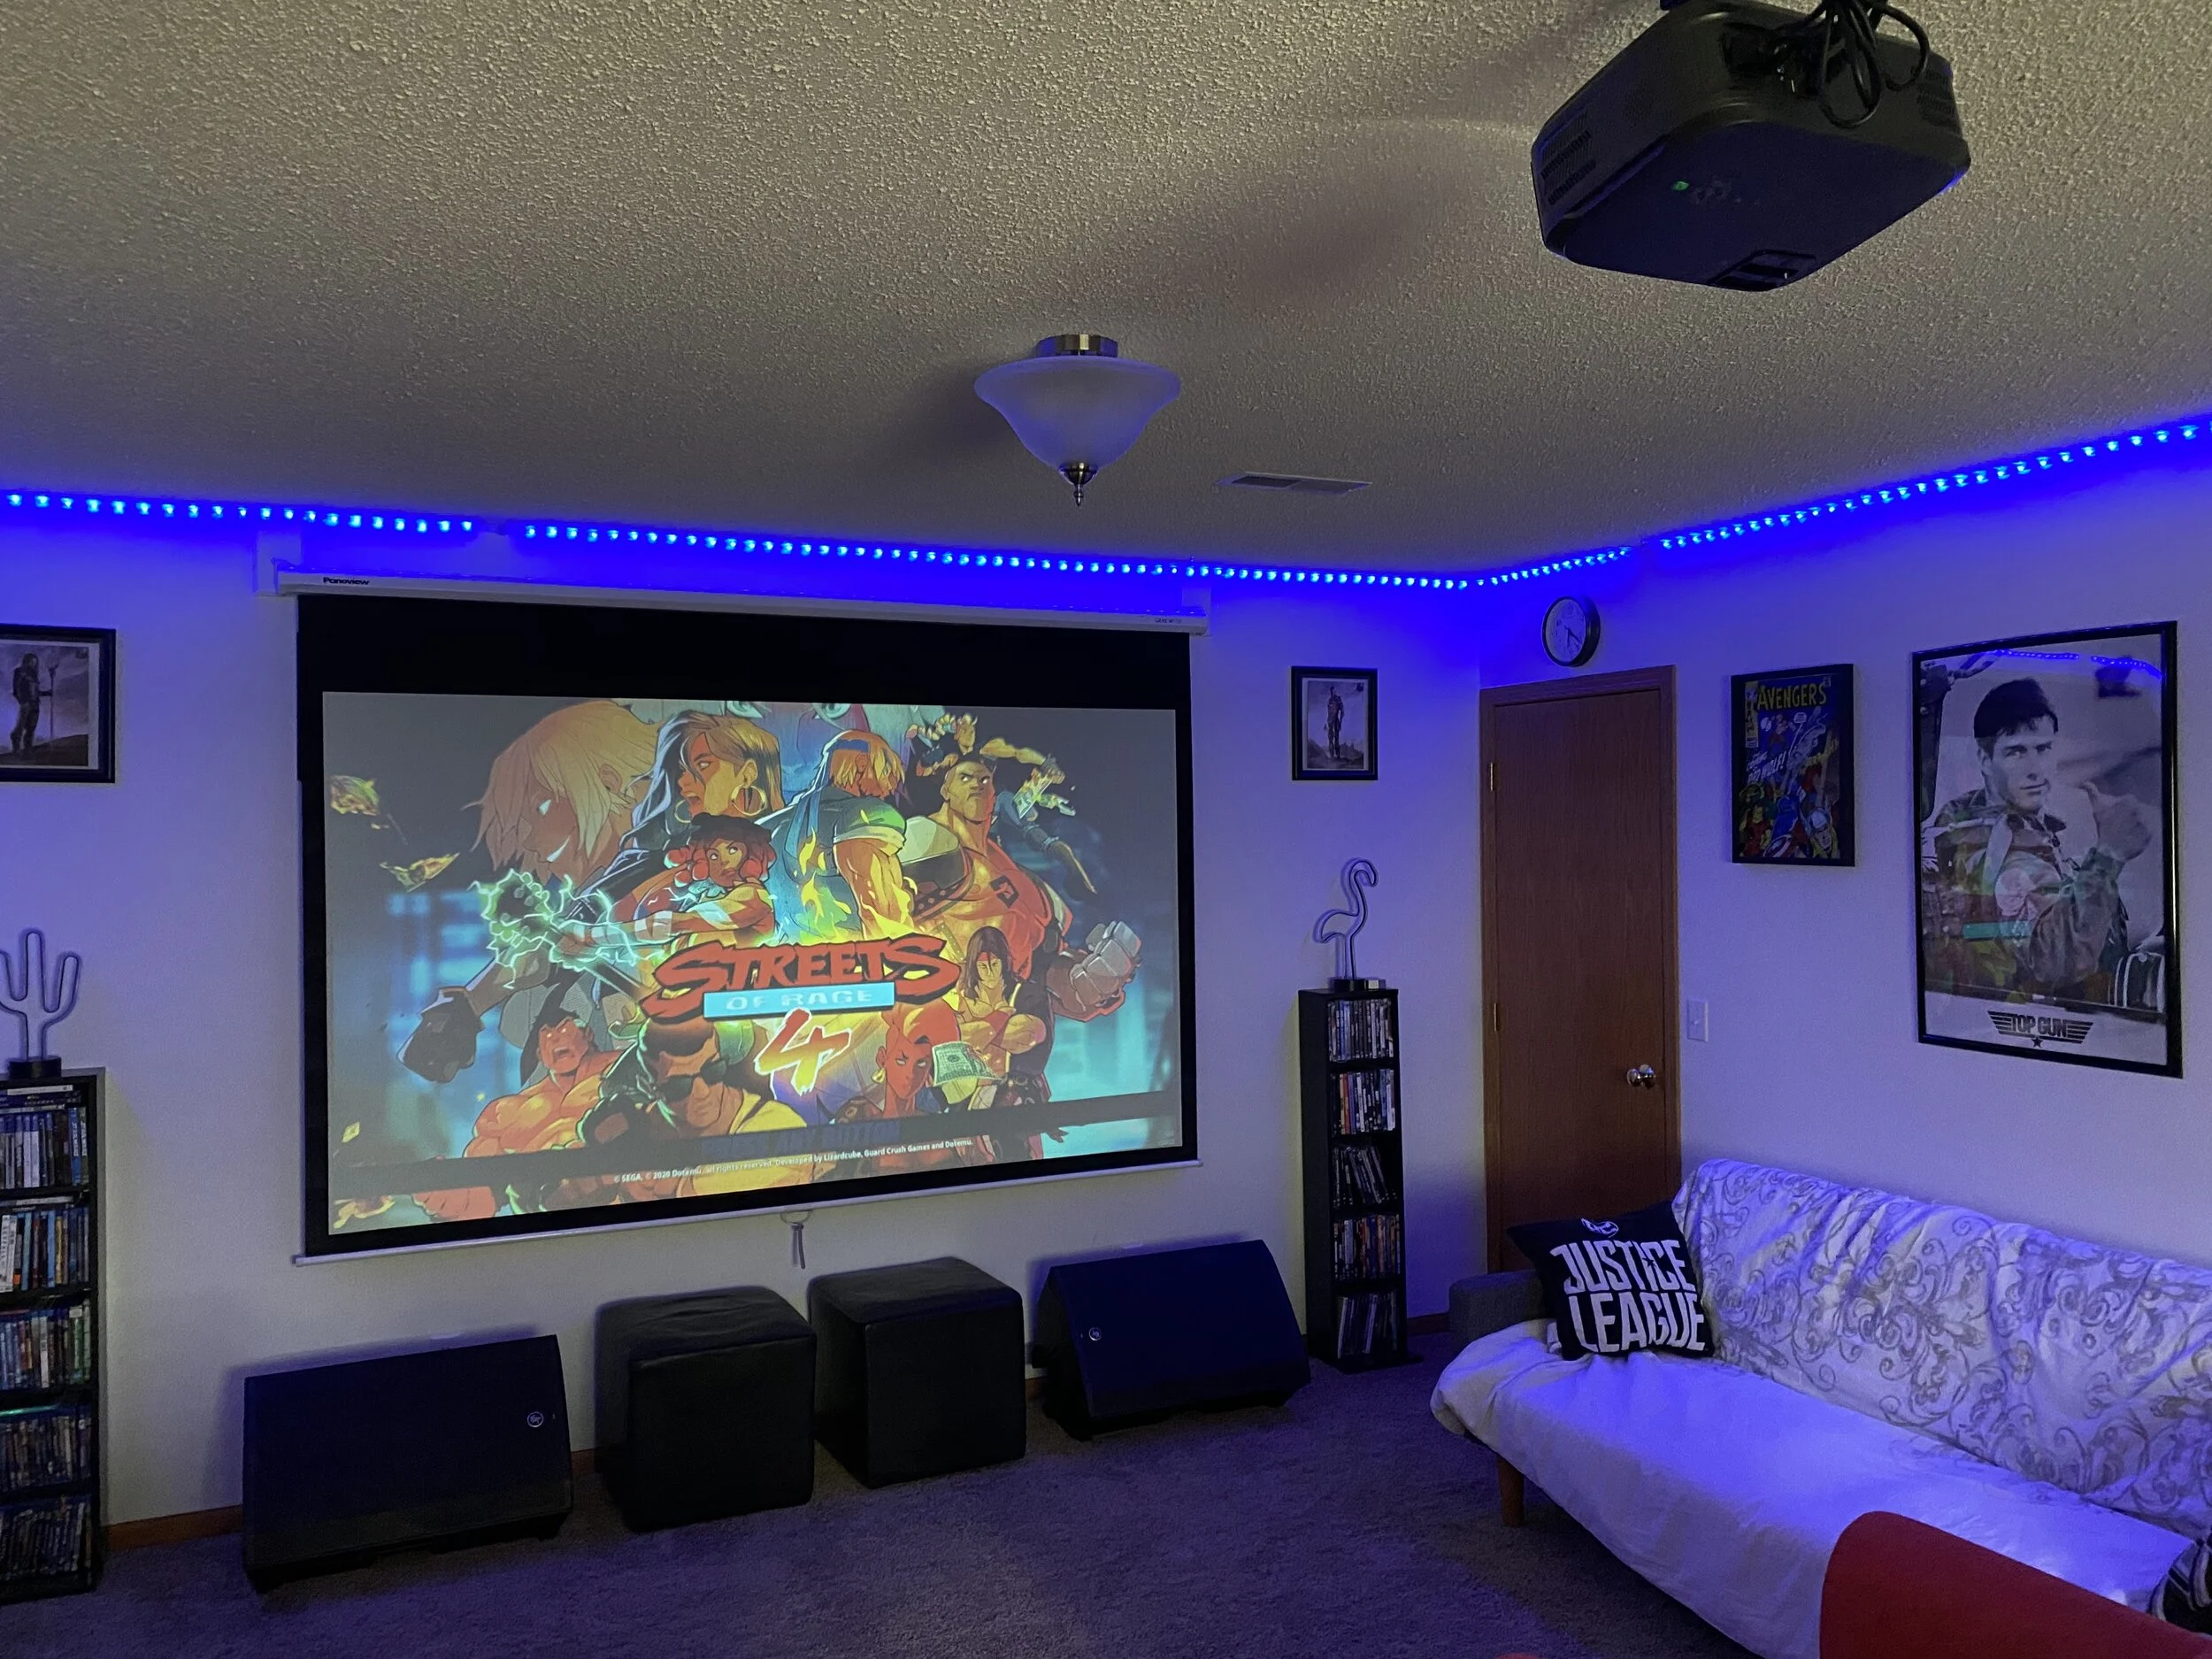
Vankyo Performance V620 LED 1080P Projector that’s both Brilliant and Cost Effective!
It all starts with a plan and the right equipment based on the room your putting it in. The Vankyo V620 is an LED projector that provides everything you need to deliver a very high quality 1080P resolution, multiple HDMI ports, VGA and USB. this gives you multiple connection options and it’s available at a very affordable price of $170.

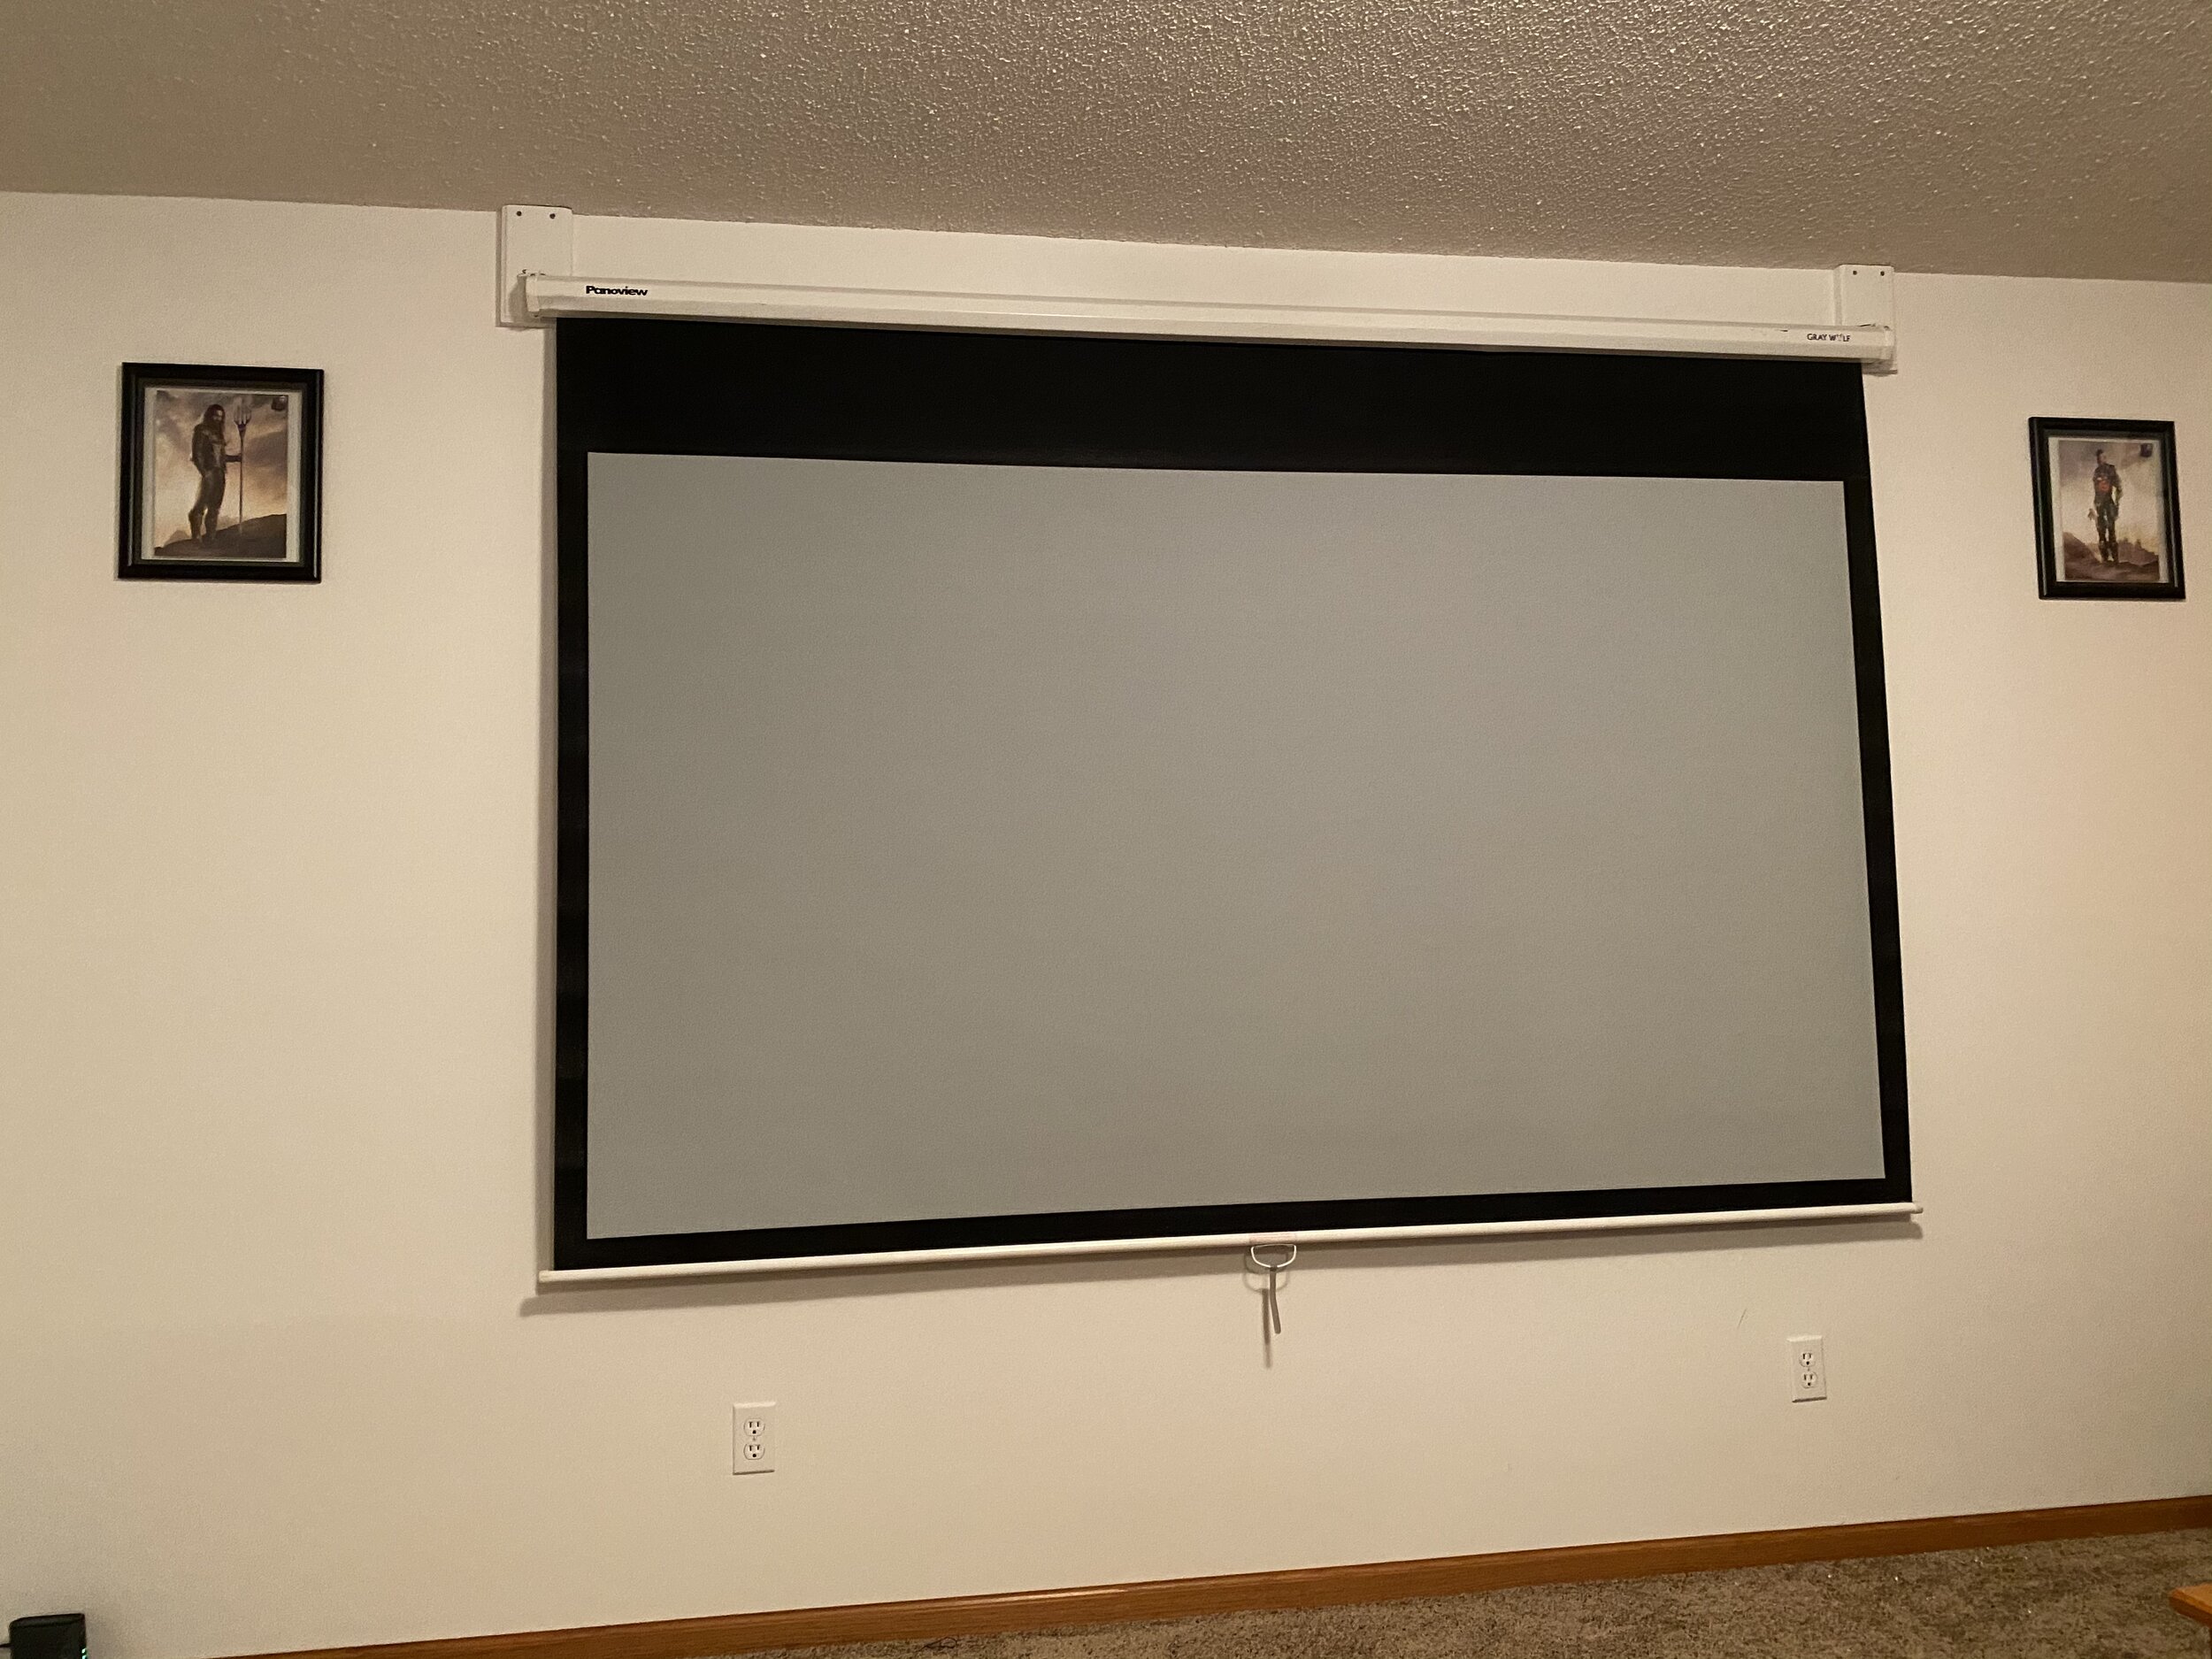
Elite Screens Manual 110” Manual Pull Down16:9,4K Ultra
HD Ready Home Theater White Projection Screen
The screen I used in my home theater room is a Gray Wolf Panoview 106” manual screen. A bought this screen 20 years ago, and have hauled this piece of equipment to and from multiple storage units over the years not wanting to part with it. I managed to keep it in one piece minus a few dents and scratches along the way. Since this screen is very hard to find now, I am suggesting the alternative Elite Screens 110” as a comparable alternative for price and quality listed at $169. Most standard projectors can produce an image from 96” to 300” inches. The viewing distances for these range from 11 to 16 feet from projector to screen, and the size of your room will factor this in for throw distance. The right size screen for your particular space will vary and also depends on the layout of your project. I reference my screen in this article to stay true to my home theater project and what i used to complete it.

15” Mackie Thump BST Boosted 1300 Watt Amplified Bluetooth Monitor Speakers w/Built it Mixers
Let’s face it, sound makes the experience ten times better when it comes to movies and games. As a semi-former DJ, I actually bought a pair of 15'“ Mackie Thump BST Powered speakers for great all around music with solid bass, and the benefits of not having to haul around much more bulky equipment while on gigs. Since I am getting older now, and DJ far less, I decided to convert these speakers to my home theater project. The biggest benefit to using these is Bluetooth, and a downloadable mobile app that allows you to control over every volume and source to these speakers completely wirelessly. Connected them Bluetooth or Wired the sound they produce is absolutely incredible. They are so versatile and are practically effortless to connect. They provide a great alternative to a receiver, multiple surround sound speakers and wires all over the place. The Mackie Thump BST’s provide strong upfront stereo sound with awesome lows. They are also available in 12'“ model with an optional 18’ Powerful Subwoofer for even more low end for those seeking very deep bass at a cost.

Vankyo Universal LED Projector Ceiling Mount Wall Bracket for V620
This Universal ceiling mount is actually worth the cheap price tag as it does exactly what it’s meant to do. Hold the projector to the ceiling, let you make the adjustments in Hight, Tilt and keystone. Just snug the adjustment screws while setting the projectors image to the screen, and fully tighten the screws (when done) to fix the mount into place. if using this with the Vankyo V620, I highly recommend lowering the slide arm as far down as possible before tightening everything down. This will make access to the projector easier in the future, and make Keystone adjustments much more simple during the installation process.

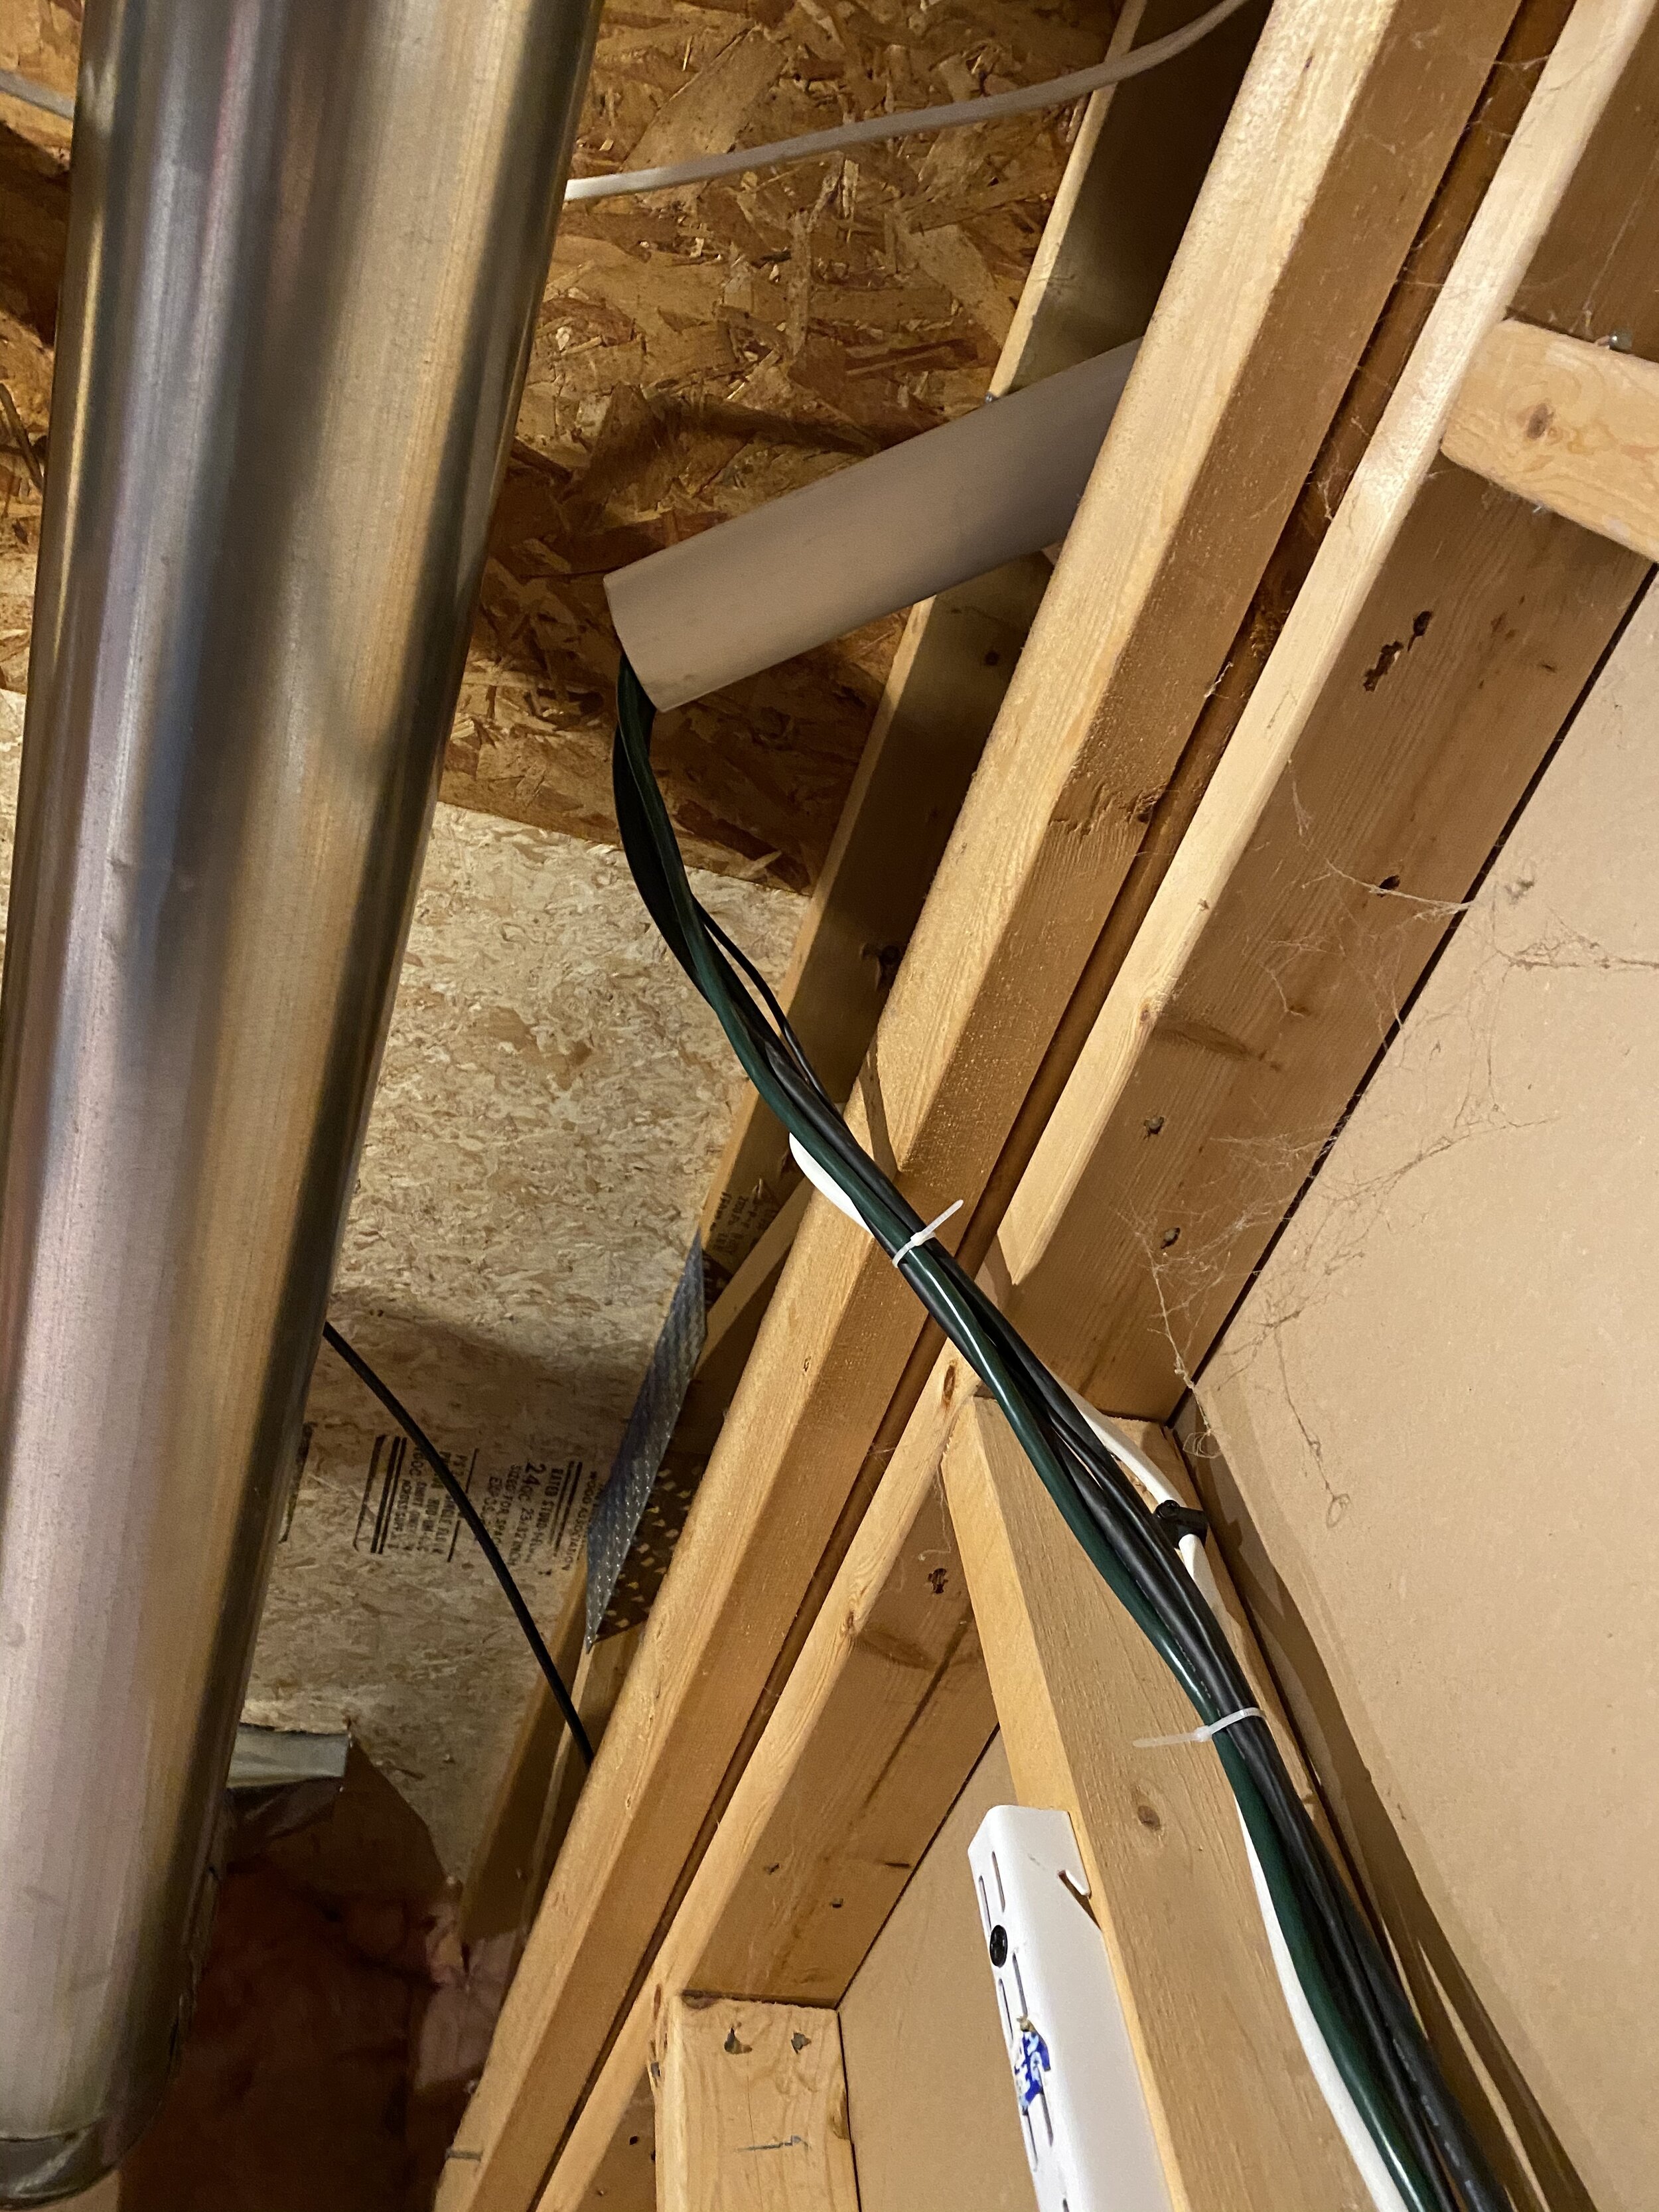
Two (25 Foot) BlueRigger 4K HDMI Cables
You will need to run two of these HDMI cables from your Projector if you are planning on hooking up two sources to the projector, and mounting your component shelf quite some distance from the unit. BlueRigger is a very quality product. The cables are very thick, CL3 rated for In-Wall Installation, and are extremely durable HDMI Cables. You will feed these cables out the 2” hole you drill in your ceiling to your projector leading from your component shelf.

Wall Plate Cable Pass Though for Wiring
You will run all of your cables though this Wall Plate onto the shelf holding your components. This makes everything look very neat and by mounting this directly under your shelf, the wires will be behind the wall and not in a balled up mess in front of it. I have a two pack listed here as if you need to mount two of these for more wires, this will give you the option based on how many separate components you may be running through the wall to plug in and give you more flexibility.

KINJOEK 2 Inch (51 MM) Hole Saw Bit
This hole saw bit will fit into your cordless drill and allow you to easily drill through your ceiling or interior wall to feed cables through. There are other methods to making a hole in the wall or ceiling, but if you want to do the job the right way, I would strongly suggest picking this up for your project. you will use this bit for other projects in the future, as this works great for drilling through different wood grains and plastic.

18-Foot Indoor/Outdoor LED Color Changing Rope Light with Remote, with 4 Light Motion Options, 1-Pack, White/Multi in Clear PVC
Good lighting can really set the mood and tone of the room. I used three sets of these LED rope lights linked together and based on size of your room will determine how any sets you should use. I placed mine in the front, left and right sides of the room. I mounted them using the clips provided and on the top of the wall and corners touching the ceiling. I started where I wanted the lights to end, and also factoring in where i was going to mount the light sensor. The sensor will mount on the wall high towards the ceiling and where you can point the remote at it from where your projector is mounted, or from where you will be sitting to watch a movie. The sensor also mounts where the the light strand starts and plugs in. it’s important to plan this out beforehand so you have a good idea of how many sets you will need. I would plan on using three sets of these lights. There are hundreds of other options when it comes to lighting, and some may be cheaper? I used these on my project and have been very happy with how they look and the different color modes.
Total Cost of this Project…


“ It all started with a big idea, and then the room to finally do it. Maybe you will want something completely different? I’ve wanted to put this together properly for years, and now share it with everyone that has always had the idea of what it would be like to put a home theater projection system in the home, and not spend a huge amount of money to do it. I hope this helps you at least with some ideas. This is a project that can be completed in a weekend and includes mostly everything you need to do it”
— Anthony C.